Feedback Form
| Introduction | Design | Ideas | Design & Control |
Project Suggestions |
| Design Process | Design Brief | Evaluation | The Design | Design Review |
| Page 1 | Page 2 | Page 3 | Page 4 | Page 5 |
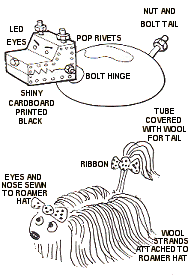
Techniques for Roamer
 |
| Time can be spent on making Jacket characters. These can be saved from one lesson to another. At the start of the next lesson put the Jacket on the Roamer and start the programming activity. Children can work on jacket designs while other children use the Roamer. |
Roamer Jackets
Jackets and Hats are practical classroom design aids developed specifically for the Roamer.
A Jacket is a plastic cover which fits over the Roamer. A character can be built onto the Jacket while the Roamer is used elsewhere.
Jackets were designed as a semi-replaceable item. They are relatively inexpensive so they can be subjected to techniques which would normally damage the Roamer. For example, they can be painted and repainted or decorated with fibre-tipped pens. Glue can be used to attach things to them and holes can be drilled in them. None of these techniques should be used on the basic Roamer. With Jackets, designs can be made permanent.
One Jacket is included in this Design Pack. Others are sold in 4 and 12 packs and are available in 4 different colours: red, green, yellow and grey.
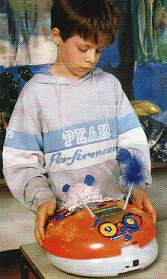
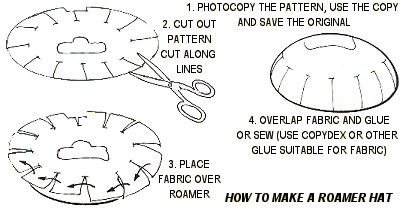
Roamer Hats
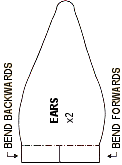
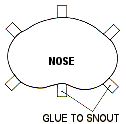
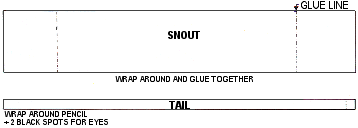
Like the Jacket, the Roamer Hat is a cover. It can be made from paper or fabric. A Roamer Hat pattern is included in this package.
|
Cutting Shapes to Fit Roamer's Surface Using Flexicurves Many Roamer designs use materials like cardboard or plastic sheets to fit the Roamer's surface. The Roamer shell is an ellipsoid of major axis 30cm and minor axis 17.5cm. The dimensions for the outside of a Jacket are: major axis 30.4cm and minor axis 17.9cm. This information should be useful for setting up CAD (Computer Aided Design) systems or for creating a series of Roamer templates. |
Flexicurves can be purchased from drawing
office or graphic supplies or any good stationers.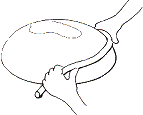 |
||||||
|
|||||||
Cut out the curve and fit
to the Roamer's surface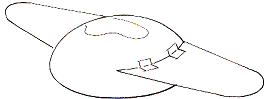 |
|||||||


Design Factors
It was discussed how design involves numerous considerations. Different disciplines consider the same factors yet their importance and the methods, techniques and technologies involved may vary considerably.
Designing a Roamer character generally involves the following factors:
- Materials
-
Style
- Function
- Manufacture
- Fastening
- Finishing
- Robot Behaviour
- Environment
Many of these factors are interrelated and need to be considered simultaneously. Consideration is a deliberate and conscious process. The factors above form the basis of a useful check list to ensure that all aspects of the design have been covered.
Materials
Some of the more common aspects a designer considers when selecting a material:
 Style: The Roamer Bumble Bee wings made with cardboard are easier to make but less insect-like than those made using cling-film. |
 Manufacture: The children decided to use a Jacket and marker pens to create the brindle coat because they felt it would be too difficult to make from fabric. |
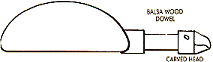 Strength: The Robotic Battering Ram uses balsa wood because of its strength, rigidity and light weight. |
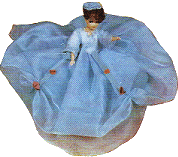 Shape and Size: Ten year old Emma developed her Roamer Doll design around the shape and size of the available dress material. |
Finish: The bubble wrap material
provided the monster with a scaly skin effect and a surface suitable
for painting.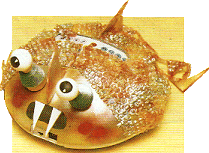 |
 Availability: House designers around the world use the locally available materials. Very often children use what's immediately available. |
|
||||||
| Transcript of a typical teacher/pupil discussion about material section. Helping children become aware of the reasons for their choice is important. | ||||||
 |
||||||
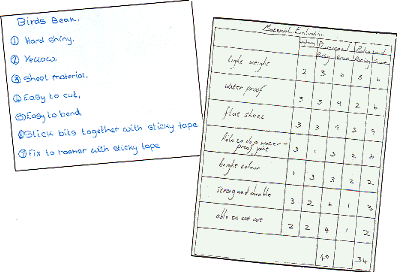
| Children in Southampton used a formal evaluation method to select the material for the poddle boat 'hull'. As ever teacher-pupil conversations are invaluable. |
Selecting Materials
A dramatic social change occurred when 'technologists' learned how to use bronze instead of stone for tools and weapons. Phrases like the Stone, Bronze, Iron, Atomic and Silicon Ages testify to the importance of materials in design and the impact of design on society.
Usually young children choose the material immediately available or sometimes the teacher may specify the material as part of the Design Brief. Wherever possible, children should be encouraged to make a conscious material selection.
It is important to know the properties of materials. Science projects and design experience will develop this knowledge. Try making the same design in different materials.
Some of the more common aspects a designer considers when selecting a material:
Composing a list of required praperties is a
useful technique
for material selection.
|
COLLECTING MATERIALS FOR ROAMER DESIGN Most models can be made using classroom 'junk' and art and craft
materials. |
 |
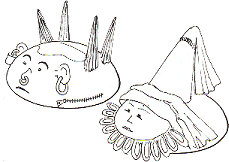
| Style is a fundamental aspect of characterisation: The mechanical style makes the Guard Dog look fierce and the fabric materials give the film stars pooch a frivolous look. |
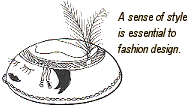
Style
Style is the way a design looks. It involves shape, colour, dimension and proportion.
Style reflects the designer's character, experience, and abilities. Style can be developed by studying design books, fashion, available products in stores and by visiting art galleries and museums.
 |
|
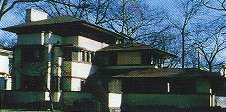
Famous American archited Frank Lloyd Wright designed the Prairie House, with their emphasis on horizontal lines and use of intemal spaces, they echoed the sweeping plains of the midwest which he loved. Photograph from the British Architectural Library, R.I.B.A., London. |
Studying a designers work reveals their stylistic development. Changes in style are often a reflection of events in the designer's everday life.
  |
Style involves attention to detail; small changes in detail can have a dramatic affect. |
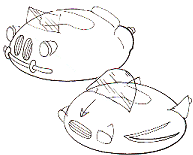
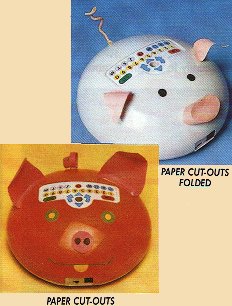
The three pig designs (see below) illustrate how materials and manufacturing method can affect the design style.
|
||||||
| Design briefs consisting of simple statements need to be developed. This normally involves clarifying functional aspects of the design. |
Function
The functional requirements are stated in the design brief. However, the brief may not describe all the requirements and often details will not be known. These will be clarified as the work progresses.
Throughout the design process the designers should constantly evaluate how well the design satisfies the requirements. This often leads to 'fine tuning' of the design and sometimes minor changes to the design brief.
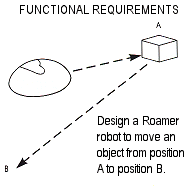
The designer needs to prioritise functional requirements. In this problem the main function is to move the object. Stylistic appearance is sacrificed to achieving that function as efficiently as possible.
 At
some stage the designer will consciously decide how the design can be
made. The options available to children will vary from school to school.
Children should be encouraged to make reasoned decisions.
At
some stage the designer will consciously decide how the design can be
made. The options available to children will vary from school to school.
Children should be encouraged to make reasoned decisions.
(Note: This Handbook does not attempt to discuss manufacturing techniques. The reader should refer to craft and technology books for such information).
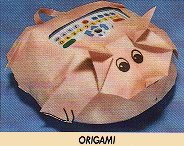
These three little pigs are all made out of paper but their appearance varies considerably. Style can depend on the method of manufacture.
Listing the Manufacturing Process
It is good practice for the designer to list the manufacturing details. This helps to highlight potential manufacturing difficulties and can lead to design improvements.
|
List of processes for making the cut out and fold Roamer Pig. |
 |
|
The more sophisticated manufacturing capability of secondary school pupils adds significantly to design possibilities.
|
Thirteen-year-old pupils making an electronic circuit to operate a police car siren operated via the Roamer Control features. 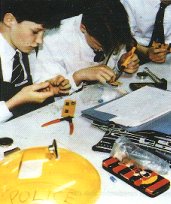
|
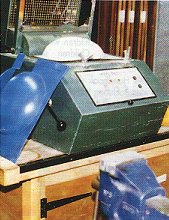
Sometimes designers have to consider the size of the machinery available to make the design. Pupils at King Edward VI school used the school's vacuum-forming machine to create their own jacket designs. The size of the machine necessitated making the jackets in two parts and joining them together. |
Selecting a Manufacturing Method
Sometimes the designer may need to choose between altemative manufacturing methods. A review of the advantages and disadvantages of each should be made. Adaptation of the formal evaluation technique may be useful. This kind of analysis highlights specialist skills and tooling requirements.
Without a saw, the wood design could not be made. Availability of tools affects the design decisions of even the largest commercial organisation.
| PVC Plastic | Paper | Fabric | Wood | |
| Marking out the shapes | Use special pen | Use pencil | Use tailor's chalk | Use pencil |
| Cutting out the shapes | Needs scissors | Needs scissors | Needs scissors | Needs saw |
| Fixing the shapes together | Not applicable | Use paper adhesive | Sew together | Tack pins Needs hammer |
| Assembling flowers onto the Roamer | Just put into position | Use Blu-Tack | Sew onto Roamer Hat | Use Blu-Tack |
| Back to top |
|---|